How to Implement Dynamic Mapping in Azure Logic Apps Using Integration Account
Hello and welcome! 😊 Today, we’re diving into an exciting aspect of Azure Logic Apps — Dynamic Mapping using an Integration Account. This powerful feature enables seamless data transformation between systems with varying formats, making it easier to automate workflows and streamline processes. By utilizing dynamic mapping, we can effortlessly adapt to evolving business needs, ensuring that data flows smoothly across multiple platforms. Let’s explore how this dynamic capability can enhance your integration solutions!
Prerequisites :
1. Create Azure Logic App
2. Create Integration Account
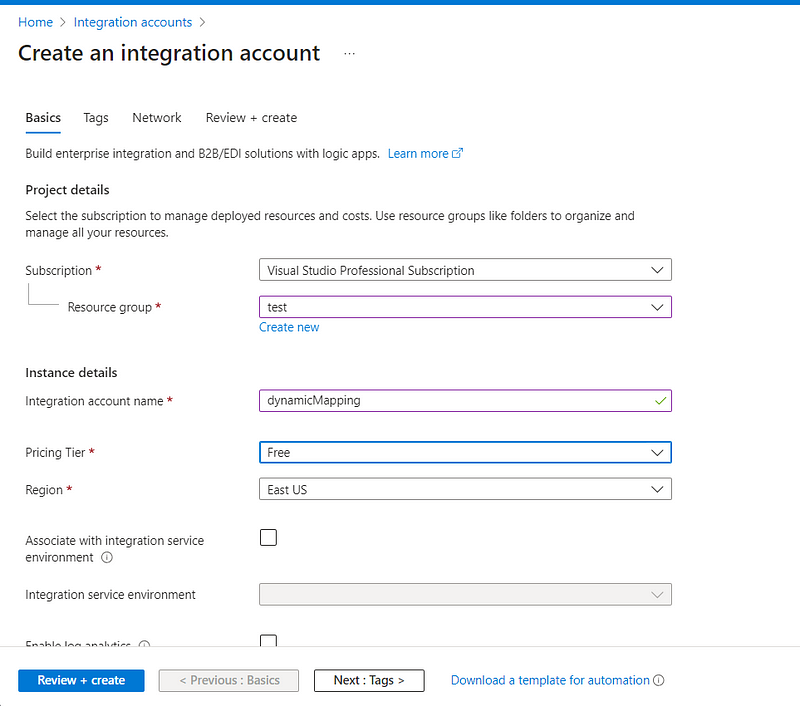
In the resource search bar, enter ‘Integration Account,’ then click ‘Create.’ Complete the required fields as shown below, leaving the remaining sections at their default settings. Finally, click ‘Review + Create’ to proceed.
Steps
Navigate to the Integration Account, go to the ‘Maps’ section, and select ‘Add.’ Upload your XSLT or Liquid transformation files in this location.
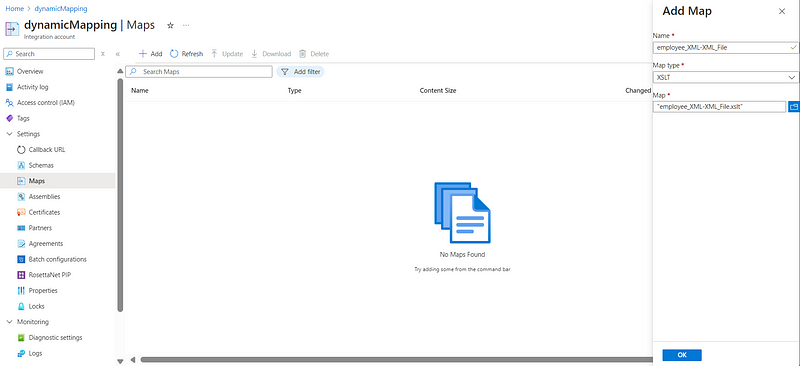
To perform the mapping, first establish a connection between the Integration Account and Azure Logic App (Standard). Navigate to the Callback URL in the Integration Account, copy the URL, and save it for future reference.

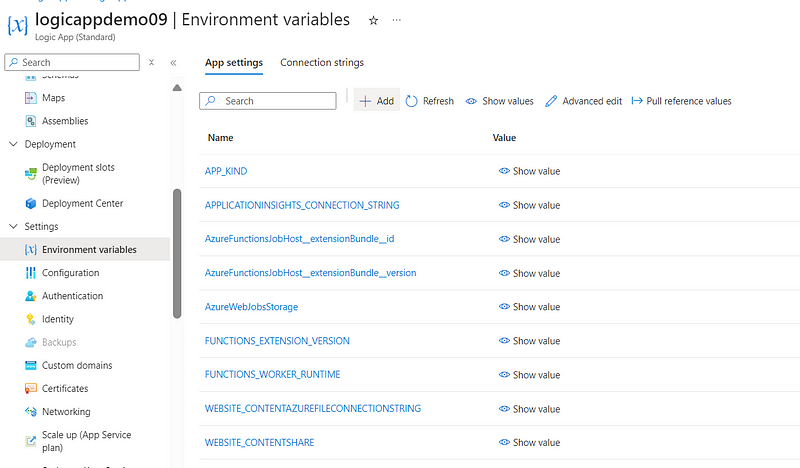
ext, navigate to the ‘Environment Variables’ section in the Azure Logic App. In the application settings, add the URL you recently copied, and then click ‘Apply’ to save the changes.


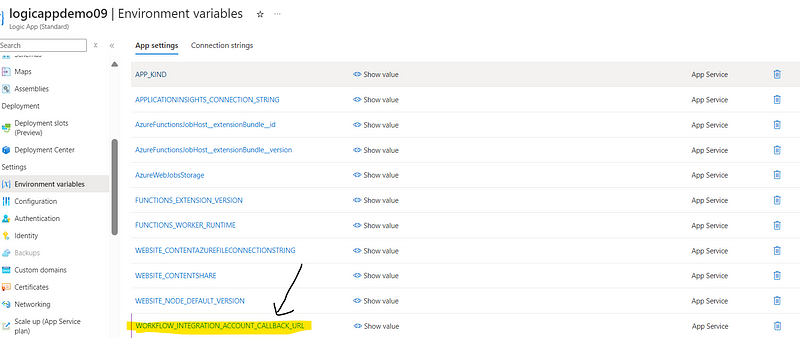
Next, we will proceed with designing the workflow, utilizing an HTTP action as the trigger.
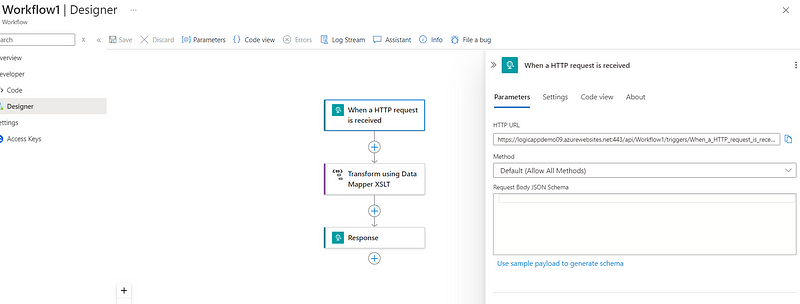
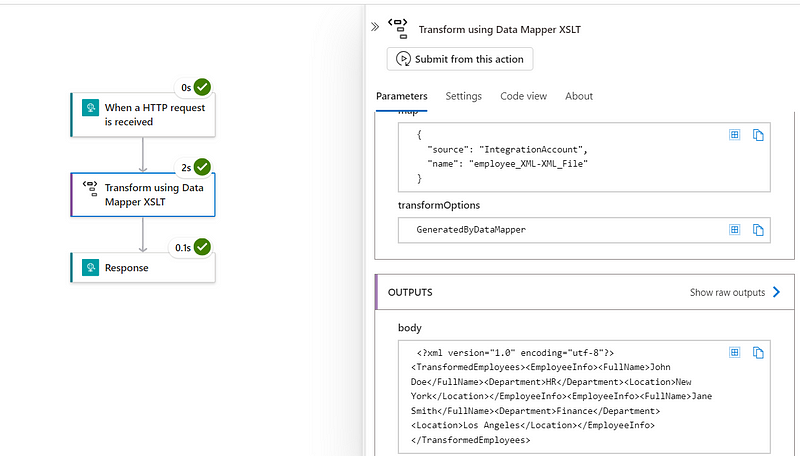
In this step, I am performing XML-to-XML mapping using an XSLT file by selecting the ‘Transforming using Data Mapper XSLT’ action. However, you may choose an alternative mapping resource based on your specific requirements.
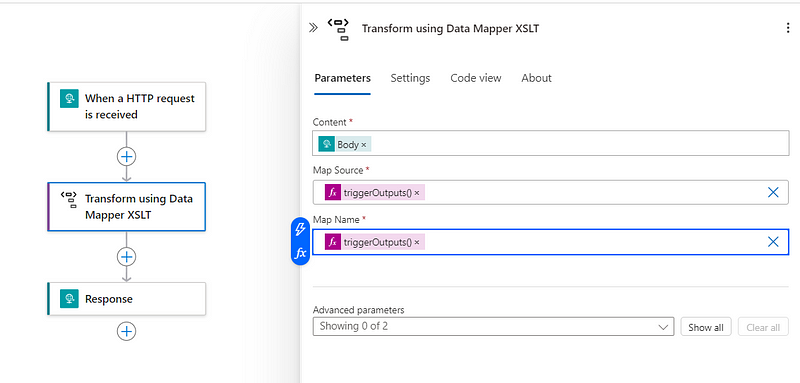
In this content, the HTTP trigger body is passed, while the ‘Map Source’ and ‘Map Name’ are retrieved from the HTTP trigger headers.
Function Expression code to call :
Map Source : triggerOutputs()?[‘headers’]?[‘Source’]
Map Name : triggerOutputs()?[‘headers’]?[‘MapName’]
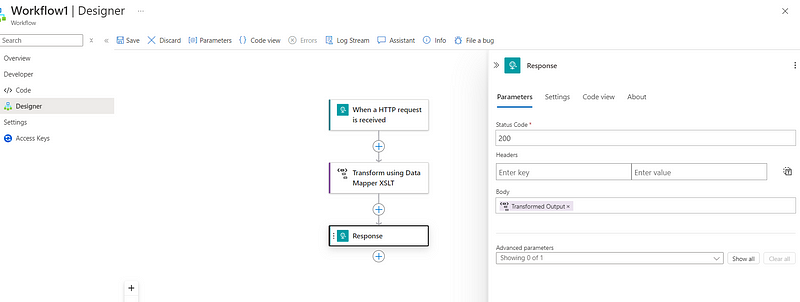
In the response storing output of Transformed data.
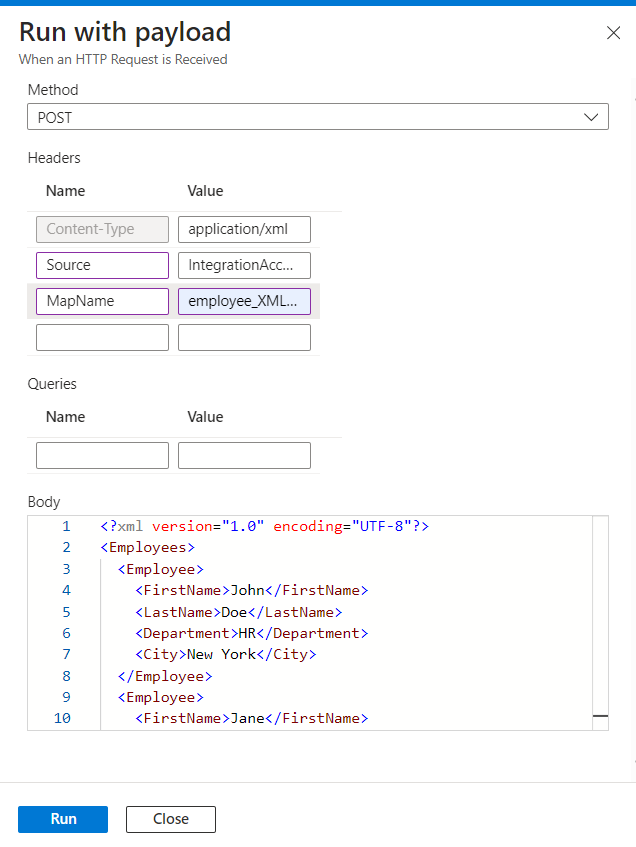
Now let’s Test our workflow!
Input :
In Header passing :
Content-Type : application/xml
Source : IntegrationAccount
MapName : employee_XML-XML_File // Please specify the XSLT file you would like to use for mapping by entering the filename in the header.
In Body given below XML : 👇🏻👇🏻
<?xml version="1.0" encoding="UTF-8"?>
<Employees>
  <Employee>
    <FirstName>John</FirstName>
    <LastName>Doe</LastName>
    <Department>HR</Department>
    <City>New York</City>
  </Employee>
  <Employee>
    <FirstName>Jane</FirstName>
    <LastName>Smith</LastName>
    <Department>Finance</Department>
    <City>Los Angeles</City>
  </Employee>
</Employees>
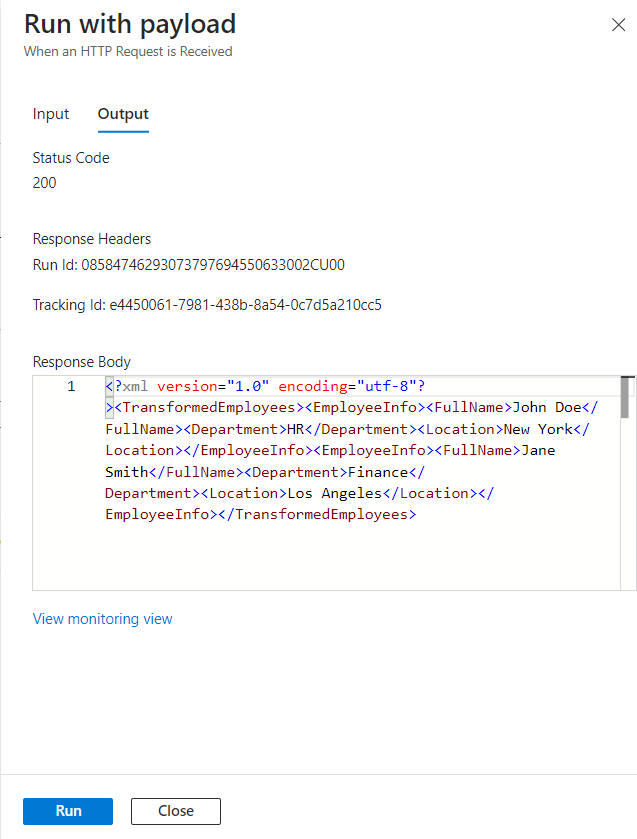
Output :
As, an output I am getting the Transformed XML content i.e :
<?xml version="1.0" encoding="utf-8"?>
<TransformedEmployees>
 <EmployeeInfo>
   <FullName>John Doe</FullName>
   <Department>HR</Department>
   <Location>New York</Location>
 </EmployeeInfo>
 <EmployeeInfo>
   <FullName>Jane Smith</FullName>
   <Department>Finance</Department>
   <Location>Los Angeles</Location>
 </EmployeeInfo>
</TransformedEmployees>
Conclusion:
Dynamic Mapping in Azure Logic Apps using Integration Account is crucial for creating flexible, reusable workflows in business integrations. It allows seamless data transformation across various systems by leveraging XSLT, Liquid, and other mapping tools. This approach reduces manual intervention, enhancing scalability and efficiency. With dynamic mapping, organizations can quickly adapt to changing data structures, ensuring smooth communication between different platforms and services.
Thanks for stopping by! Your visit means a lot. Please Follow me😊 Stay tuned for more content. Exciting stuff coming your way soon! 🚀 #StayTuned.






Post Comment
You must be logged in to post a comment.